
While Google might be the Colosseum of search engines, Bing is the Pantheon – often overlooked, but valuable and powerful in its own right. Bing, Microsoft’s search engine, currently holds 8.85% of the global search market as of January 2023, and that’s no small feat.
Sure, it may not be the giant Google is, but it’s growing, and your law firm should pay attention.
Bing’s impressive resurgence has been spurred on by Microsoft’s multi-billion-dollar investment in AI technologies like ChatGPT and the Prometheus model. These AI advancements allow Bing to understand the context and nuance of search queries, providing an incredibly tailored user experience.
It’s these precise, accurate, and relevant search results that are contributing to Bing’s increasing share of the search market.
Why is Bing important for your law firm?
Bing offers an opportunity to reach a significant and growing audience. By creating a Bing Places business listing, your law firm can access Bing’s expanding user base, getting potential clients you might otherwise overlook.
Bing Places also provides you with greater control over your business information. By claiming your firm on Bing Places, you can ensure information about your firm is accurate, up-to-date, and presented just the way you want it. Ultimately, that means your firm would be a pioneer as one of the early adopters behind a promising engine.
Your Step-by-Step Guide to Creating a Bing Places Business Listing
Step 1: Go to Bing Places
Visit the Bing Places for Business website at https://www.bingplaces.com/.

Step 2: Claim or Create New Listing
Bing might already have a basic listing for your law firm. Enter your law firm’s name and location to check. If your law firm is listed, you’ll be given the option to claim and manage the listing.
If your business isn’t listed yet, you’ll need to create a new listing. Click on “Add new business.” If it is listed, click “Claim your business.”

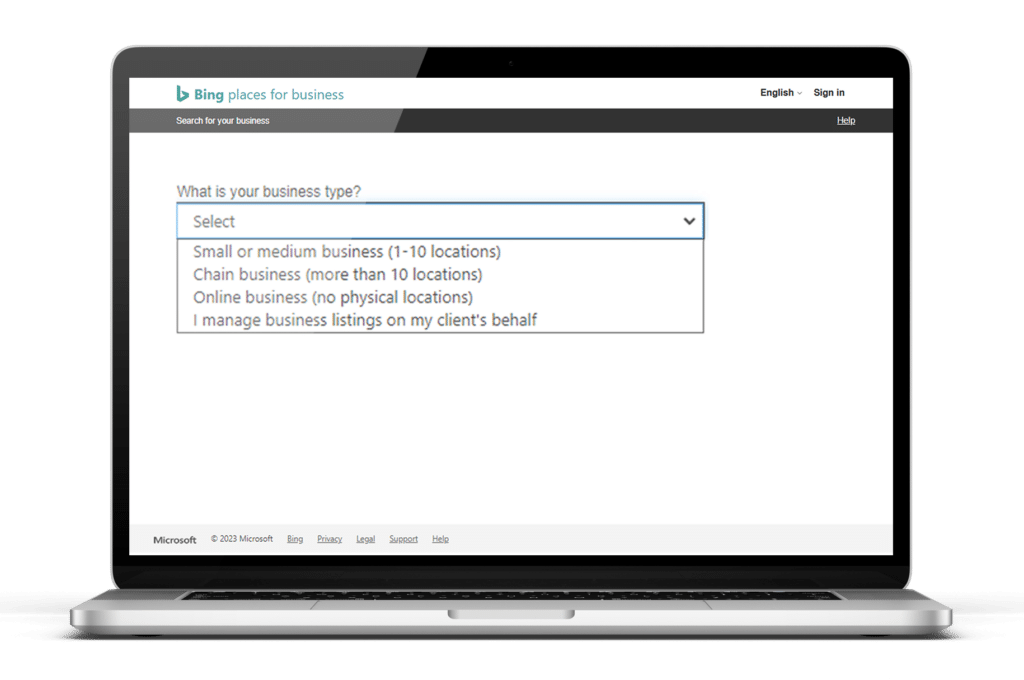
Step 3: Choose Your Business Type
You’ll need to specify your business type. As a law firm, you’d likely choose ‘storefront,’ indicating you have a physical office where you meet clients.
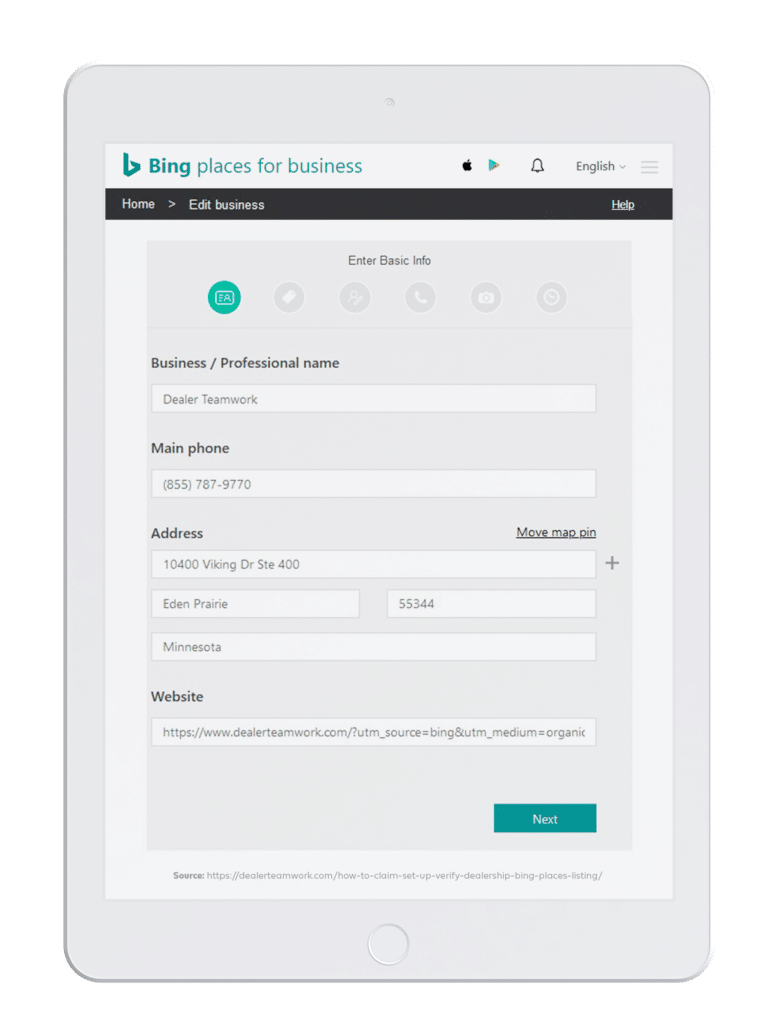
Step 4: Enter Your Firm Details
Provide all the necessary information about your business, including its name, address, phone number, website, hours of operation, and any other relevant details.
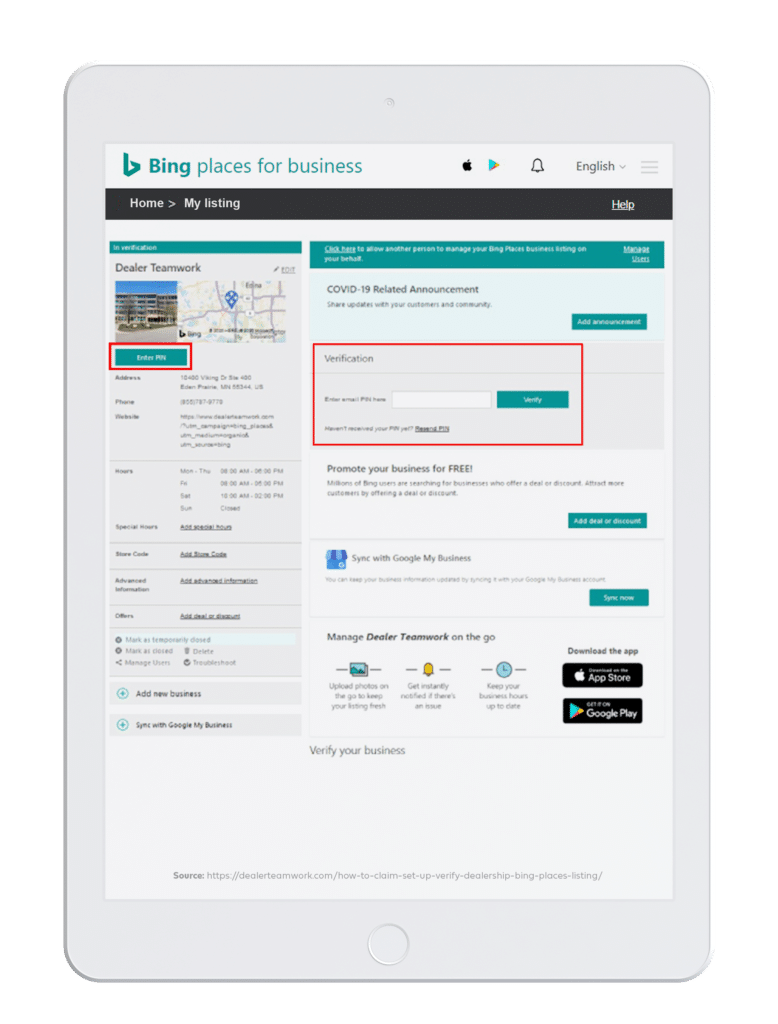
Step 5: Verification
You need to verify your ownership of the business to prevent fraud. You can verify your listings by receiving a PIN at your business address, phone, or email.
Step 6: Add Photos
You can add photos to your listing. Consider including professional photos of your law firm, your team, or any other images that could help potential clients understand what your firm is about.

Discover the Best Headshot Strategies for Legal Professionals
Step 7: Review and Publish
Before publishing your listing, review all the details you’ve entered to make sure they’re correct. Once you’re satisfied, click “Publish.”
Takeaway: Bing Your Business to the Top
With its significant market share and innovative AI-backed features, Bing is much more than just an alternative to Google; it’s an indispensable tool for businesses, particularly law firms, looking to broaden their reach.
By creating and maintaining a comprehensive Bing Places business listing, you can ultimately reach a wider audience and control the information that’s out there about your firm.
Want more guidance on how to get started on Bing Places or other legal marketing ventures? Don’t worry – Book Your Free Consultation Today.